Students visually functioning in Phase II often benefit from having their food bowl illuminated. This encourages reaching behavior and grasping of small pieces of finger foods. In this article, I will share with you how I have made two different illuminated bowls.
Illumi-bowl 1
Since many of my students have difficulty viewing targets and objects when placed in their lower visual field, I am always looking at ways to bring a food bowl up into the student’s best field of view.
While in Virginia recently conducting a teacher training, I was discussing how use of a lighted bowl during meal times encourages children who visually function in Phase II to visually search for the bowl, then look for the food, reach and grasp. I showed this group my various strategies that I had come up with to date and one of the participants said, why don’t you use a Plexiglas top to stick the bowl to. Ah ha! Why not?
So, this Illumi-bowl was born.

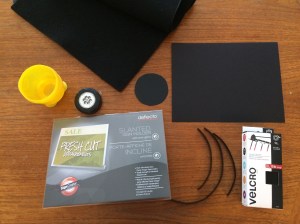
The materials you will need include;
A black, Velcro compatible mat
Velcro
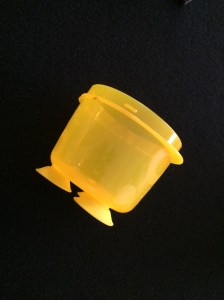
A cup or bowl that has suction cup “feet”
An 8.5X11 inch sheet of heavy, black cover stock
An under cabinet, battery operated puck light (my favorite type is shown under the Recommended Products pull down window – Light-It by Fulcrum, 9 LED Wireless Anywhere Stick on Tap Light)
An 8.5X11 inch plexiglass sign holder or frame (the type with angled stand attached)


How to assemble;
Use your bowl size as your pattern to draw a circle in the center of the black paper. Cut out the circle.
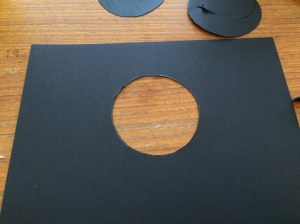
Slide the paper with the cut out hole, into the sign holder.

Cut a length of Velcro and attach it to the edge of the angled sign holder.

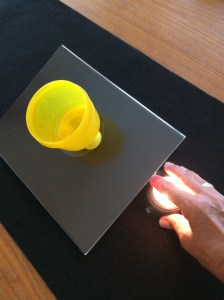
Place a bit of Velcro on to the back of the puck light. Set the angled sign holder so that it creates an angled “slanted” stand on the black, Velcro compatible cloth, so that it is firmly in one place. Attach your bowl with the suction feet to the plexiglass angled sign holder, just over the cut out spot.
Finally, turn on the puck light and slide it under the slanted stand so that it is directly under the cut out hole and bowl. Then press and attach it firmly onto the black, Velcro compatible cloth.
Ta Dah! An illuminated bowl that is lifted slightly at an angle, bringing it more into the child’s field of view.
Illumi-bowl 2
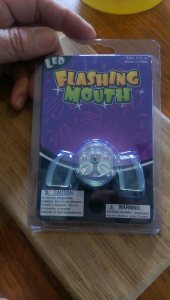
To create this illumi-bowl, start off with an LED Flashing Mouth. This is a waterproof, blinking, mouth guard-like inexpensive gadget. You can order them at Amazon.
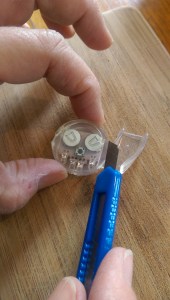
You will need to take an exacto-knife and cut off the two sides that are meant for teeth to grip down on. You should end up with a small, quarter sized piece that when pressed, blinks.

There are several ways to attach the blinking light to the bowl, but the two I have often used are the following;
“Tacky Attach”; Take a small piece of Tacky and shape it into a flat dime sized piece. The Tacky can be either blue or white. Stick it to where you want the blinking light and stick the dime sized blinking light to the Tacky.

“Mini Light Holder Suction Attach”: Take a Mini Light Holder, the type you use to attach a line of holiday lights to a window, and cut off the ends you string your lights through leaving only the clear, plastic suction cup. Then, using a hot glue gun, place a large spot of hot glue on the outside of the suction cup and attach the blinking light (on/off side facing outward) to the suction cup.


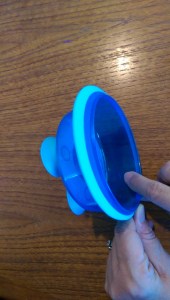
Use a child safe plastic bowl in the child’s preferred color. The bowl can either be one with multiple suction cups on the bottom of it (use the “Tacky Attach” method to secure the blinking light) or one with a single large suction cup (use the “Mini Light Holder Suction Attach” method to secure the light). Position the bowl at an angle so that it isn’t presented in the child’s lower visual field.
Attach the LED light to the bottom of the bowl with Tacky when there are multiple suction cups. Attach the LED light to the side of the bowl when there is a single, large suction cup on the bottom of the bowl. Press the light to activate the light. Press again to turn it off.


Since many students with CVI have difficulty viewing targets when they are presented in their lower visual field, use an All-In-One Board and use the suction cup feature to attach the bowl to the white side of the board.
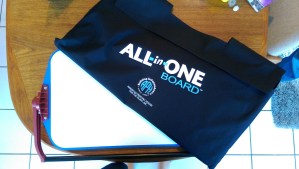
Place the slanted board with the cup attached in the child’s preferred field of view, no further than 12 to 18 inches away. Use finger foods that are in a contrasting color from the bowl, so that the food pieces stand out. SpotLIGHT the food/bowl if needed.

