The Position Board, originally created by Lilli Nielsen, can be easily adapted so that students with Cortical Visual Impairments (CVI) can access and learn from them as well. Prior to making any Position Board that is intended to be used by a student with CVI, determine if you expect that child to use his/her visual learning channel when using the Board. If you do expect vision to be used, you will need to know the results of a recently completed CVI Range. The results of the CVI Range will help you to determine the number of targets to use on the Board, the placement of targets, Color Highlighting techniques to use, and what type of target you will use. Children who visually function in Phase I, often can tolerate only one target on the Board, with the target being a favorite, familiar single colored object. They may need all other forms of competing sensory input to be reduced or eliminated. Students in Phase II may tolerate more than one or two targets on the Board, but may need to have them well spaced and have some element of their favored, familiar target still be present. Some students may benefit from use of SpotLIGHTing Techniques. This is all determined by interviews, observations and direct evaluation through use of the CVI Range.
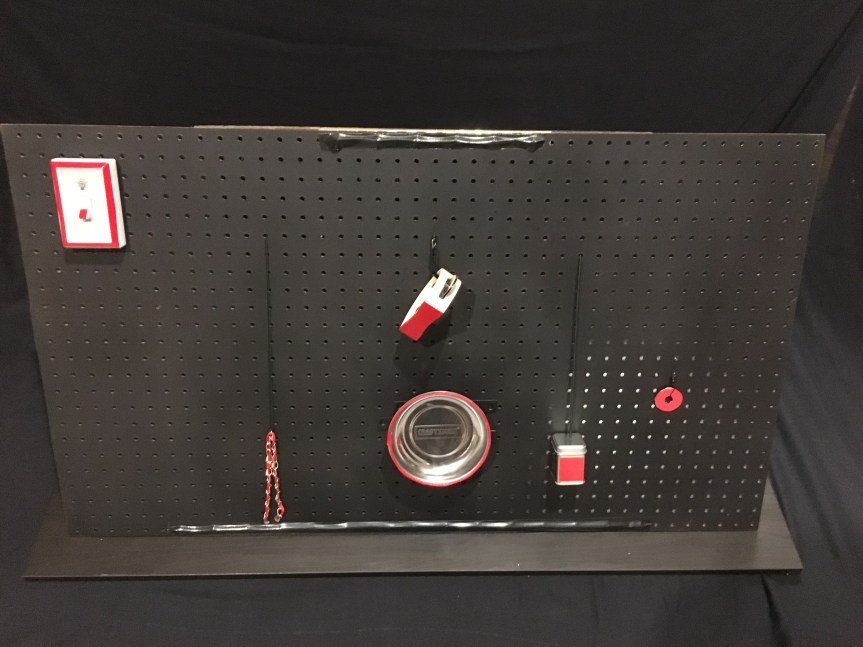
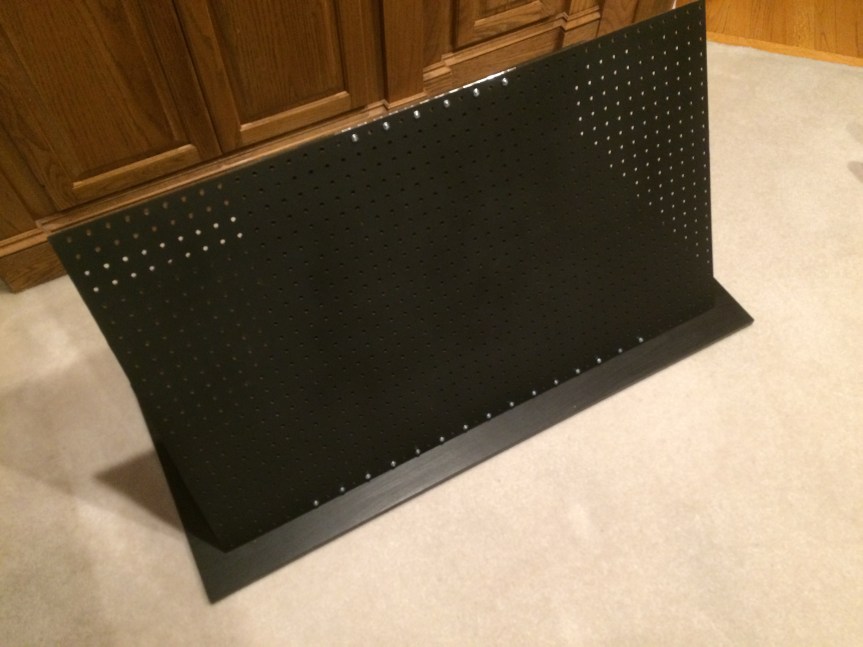
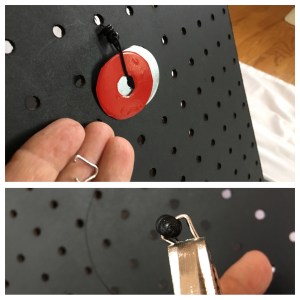
The Position Board (sometimes called a Presentation Board) in the photo above, was developed for a student with CVI who visually functions at the high end of Phase I/beginning of Phase II. The magnetic Craftsman bowl “holds” the metal objects so that they will stay put when the student puts them “In” the bowl and are still there when he goes to take them “Out” of the bowl. The retractable line (badge holder reel) attached to the tambourine and the set of metal discs puts the objects back in their original position when removed from the bowl. Other interesting objects include a small, cube shaped metal canister filled with pinto beans which makes quite a loud noise when shaken and a metal chain which has a quieter sound when gently touched. These later two objects are connected to the Board with elastic cording (adjustable by using plastic cord locks from behind the board).
All targets make use of Color Highlighting, discussed in detail by Ellen Mazel at the Perkins eLearning website;
http://www.perkinselearning.org/videos/teachable-moment/color-highlighting-children-cvi
For example, the tambourine handle, where the student should visually locate, reach towards and grasp, is Color Highlighted in red, reflective tape. The magnetic Craftsman bowl is Color Highlighted using red cording which is glued to the rim of the bowl.
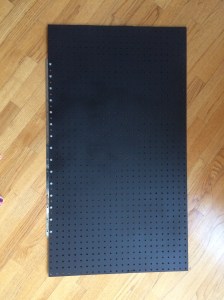
The Position Board itself is spray painted a flat black color and use of a black Invisiboard or black sheet behind the Board helps to eliminate the light showing through the holes (photographed below against white for the viewer to better see the size and details). Since the Board is large, targets can be well spaced to reduce the array being too visually cluttered.
This Position Board is well supported with a heavy base. When students pull on objects, bringing them close to their face to explore, the Base and Board stay put.

To make this Position Board, I used the following materials;
One piece of pegboard for the main Position Board measuring 24 inches X 42 inches
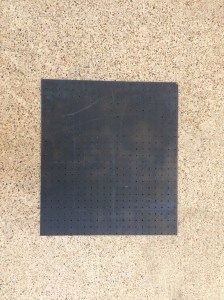
One piece of pegboard for the support board measuring 21 inches X 23 1/2 inches
One solid board for the base (I used an old Ikea coffee table top) measuring 26 1/2 inches X 46 inches in size
Two Piano Hinges. Mine is made by Gate House and found at Lowes; 1 1/2 inches X 12 inches and 1 1/16 inches X 30 inches
Twist Chain #200. Mine is made by Blue Hawk and found at Lowes. I bought a 10 foot length.
Heavy duty black elastic cording. Mine was by Paracord Plane and found on Amazon;
https://www.amazon.com/gp/product/B00HAMI5RQ/ref=oh_aui_detailpage_o05_s00?ie=UTF8&psc=1
Lighter weight black Beading Cord Elastic (mine is by Dritz and purchased at Joanne Fabrics)
Metal washers 1/2″ X 1 1/2 ” in size (I purchased Hillman brand, 25 in a package)
Plastic Cord Locks. Found on Amazon, 10 to a pack;
https://www.amazon.com/gp/product/B01FH9DYU6/ref=oh_aui_detailpage_o05_s00?ie=UTF8&psc=1
Wooden tambourine with metal clackers
Cube shaped, 3 oz. metal canisters. Found on Amazon; look for magnetic spice tins (can also use round shaped)
Craftsman magnetic bowl or tray. Found on Amazon;
Flat Phillips with nuts; #10 – 32 X 1/2 inch by Hillman works well for the standard holes in the pegboard and in the hinge
Black Gorilla tape or Duct Tape
Black retractable (reel type) badge holder (I used Hy-Ko Products Company, black, found at Lowe’s)
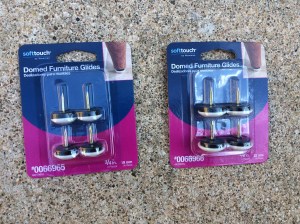
Domed Furniture Glides, 7/8ths inch, pack of 4 found at Lowe’s
Scotchlite Reflective Tape in red. This tape is made by 3M, 2 inches wide by 10 feet long.
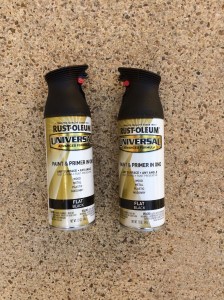
Flat, black Rust-Oleum Universal spray paint and primer
MAKE THE POSITION BOARD
Feel free to adjust Position Board size, colors (for Color Highlighting, depending on the preferred color of your student) and targets to you specific needs.
Begin with a heavy duty base. I used a obsolete Ikea coffee table top which was already in a flat black color. You can use any heavy piece of board and paint it a flat black measured 26 1/2 inches X 46 inches in size and is HEAVY. This makes it difficult to transport around, but I traded that “Itinerant Friendly” quality for the characteristic of stability; the Position Board stays put when students pulled on targets.
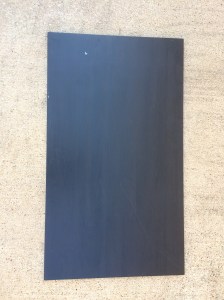
Cut the Position Board slightly smaller than the base. I cut my board to measuring 24 inches X 42 inches, then spray painted it a flat black.

Cut your supporting board so that your Position Board will stand upright. My supporting board is 21 inches X 23 1/2 inches in size.
Attach your Position Board to the Base with the 1 1/16 inches X 30 inches piano hinge and the flat Phillips with nuts. First attach one side of the hinge to the Position Board. Next, attach the other side of the hinge to the Base.
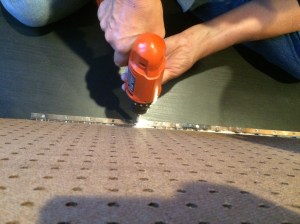
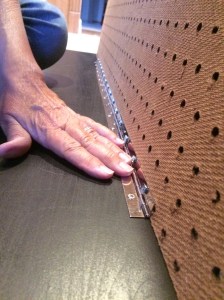


At the top of the Position Board, attach the supporting board using the shorter Piano Hinge (same method as above).


To hold the supporting board in place, I used two rows of Domed Furniture Glides, which I pounded into the Base.


For added security, I used Velcro to keep the Position Board in place.

Since the nuts, bolts and hinges are silver, they cause additional “Visual Clutter”. This needed to be eliminated.
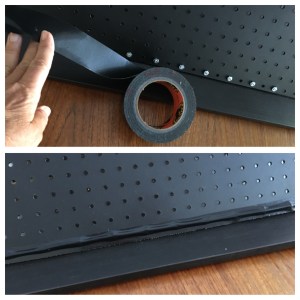
I used a flat black Gorilla Tape to cover the nuts and bolts. You could also use more flat black spray paint. Since I didn’t want small hands to be “snagged” on the bolts, use of the tape worked best for my needs.
MODIFY AND/OR MAKE THE TARGETS
As noted above, it is crucial to know the visual functioning level of your student (as determined by the CVI Range) when choosing appropriate materials and targets to place on the Position Board, IF you expect your student to use vision while working at the Board. If the student is visually functioning in Phase I, it will be best to use favored, familiar targets in the student’s preferred color. You may only be able to start off by using one target on the board, gradually working up to two, well spaced targets. The student who this board was made for is visually functioning at the high end of Phase I and just into Phase II. He can tolerate more than one target on the board if they are well spaced. His preferred color is red.
Since one of the concepts this student is working on is “In” and “Out”, the Position Board activities revolve around these concepts. I start off with a Craftsman magnetic bowl. It has Color Highlighting around the rim (red cording glued on) and attaches to the Position Board by use of 3 flat pieces of metal (6″ X 3/4ths “) with nuts and bolts. The three flat pieces were spray painted black.
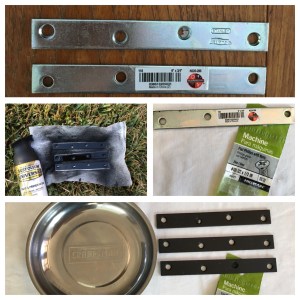

Attach the metal bars, parallel to one another, where you want the bowl positioned on the board.
I modified three metal cans, filling each with a different material (rice, sesame seeds and pinto beans). Therefore, when shaken, they each make a different sound. Because this student is visually functioning at the low end of Phase II, I will begin with using only one sound shaker can, but will make 3 to use later on with this student or to use with a different student. The cans can be ordered through Amazon and I purchased the 3 oz. size and fixed the lid in place (after filling) with a few drops of Gorilla Glue. I used red reflective tape to Color Highlight the bottom and one side of the can. Prior to gluing the lid on, I pounded a nail through the lid to make a hole then I threaded the elastic cording through the hole and tied a knot. The other end will push through the pegboard and be held at the appropriate spot by the plastic cord lock.


I made 3 sets of the Color Highlighted metal washers (again, only using one set for this particular student). For each set of metal 1 1/2 inch washers, I attached red reflective tape to one side of each washer. You can attach elastic bead cording with a plastic cord lock at the end, as shown in the photo, or, you can use a retractable badge holder (see separate directions below).

I also made 3 Color Highlighted chains (again, only using one for this particular student). I use the Twist Chain #200 made by Blue Hawk for these targets. I weave the red cording through the chain and used the bead elastic with the cord lock to hang it from the board. 
The tambourine is a simple, wooden tambourine with metal clackers and I found it in my closet of toys and targets. I used the red reflective tape to Color Highlight the handle and I used a retractable badge holder (reel) so that the tambourine can be pulled to the student, and then when he/she lets go of the target, it goes back to it’s same location. I dissembled the badge holder so that it can be “hidden” behind the board, with only the string coming through the hole to attach to the tambourine (see separate directions below).
 The finished board could have many targets on it, but it is easy to take targets off for individual needs. Remember to use a black sheet or an Invisiboard behind the Position Board to eliminate the “Visual Clutter” of the white dots. The white sheeting in the photo was used for the viewer to better see the final Board.


The magnetic bowl holds the targets in place until the student is ready to take them, “Out”.

Keep in mind that some students, particularly students who visually function in Phase I, may benefit from a target that is SpotLIGHTed. See this website for more information on SpotLIGHTing Techniques.

Please remember that any child using a Position Board will need constant monitoring and supervision. Careful consideration and caution must be used to determine appropriate items to attach to the Board. Please note that most of the materials used on the Position Board in this posting are not “Child Safe”. Do not use any items that can be easily broken, may pose a choking risk or have sharp edges. Use of these techniques and strategies are at your own risk. The builder is responsible for the safety of the child using the equipment.
Additional Notes/Separate Directions:
I am often asked how I attach my retractable badge holders from behind the Board. I like to attach the reel behind the Board because then there is less “Visual Clutter” on the front of the Board. Here is how I do it;
Locate a black retractable badge holder which can sometimes be found at Lowe’s or at Amazon.

The tools you will need will be a pair of pliers, locking pliers, black Duct tape, Gorilla glue, and a fine pick.

Pull the cord out as far as it will go then use the tape to hold it in place.

It should look like this;

Now, cut the line very close to the end of the line;

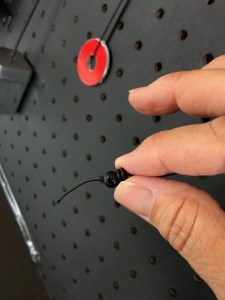
Using the two pliers, pull apart the triangular shaped attachment between the toggle and the plastic/snapping badge holder. Throw away the plastic/snapping badge holder but keep the toggle.


Using a finely pointed pick, tease out the knot from the toggle.

Take the end of the line and from behind the Position Board, thread it through the spot where you want your target to hang.

Re-thread the line through the toggle. Tie a knot at the end and secure with a drop of Gorilla Glue.

Re-attach the triangular metal connector or attach directly to your target.
Now your target will be flush with your Position Board. No additional “Visual Clutter” will be created with your connection.
Flipping Switches
Many of you may have noticed the “light switch” in some of the photos, at the top left of my Position Board. One of my students likes to work on Cause and Effect by turning on and off lights. I have both the switch and the knob varieties and hold them in place on a Position Board by using a heavy duty Velcro. Here are the two types of switches I use;


Both switches are made by Promier Products and can be ordered from Amazon at;
Both of these switches are dimmable and cordless. They run on batteries and are very bright (be careful to not aim them at eyes!). I have Color Highlighted them using a red, reflective tape.
