This book was modeled after a“Pegboard Book” created by Patty Obrzut, Assistant Director at the Penrickton Center for the Blind. Her original version can be found here. In addition, an alternate version can be found here.
INTRODUCTION
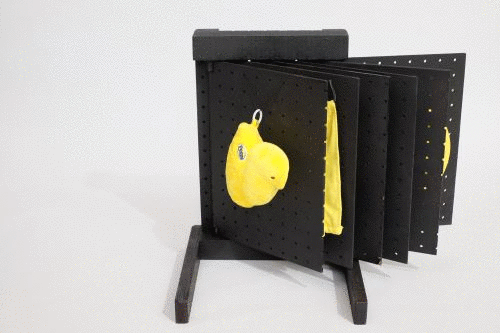
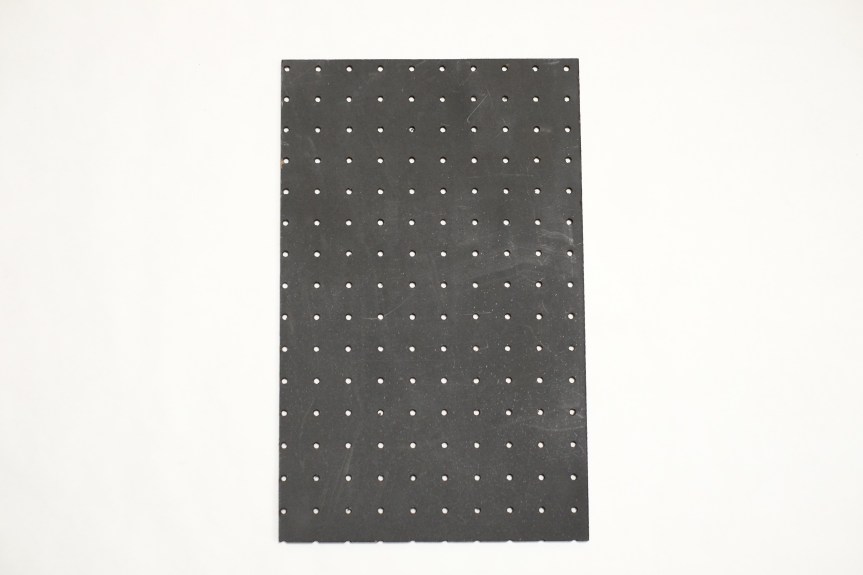
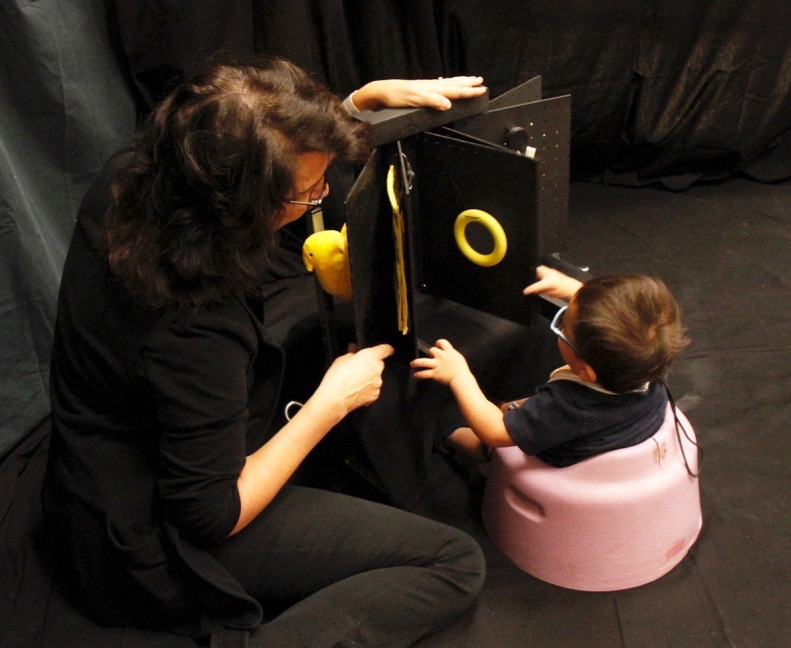
This “CVI Friendly” version of a “Pegboard Book” was created, in part, with the work of Dr. Lilli Nielsen and her Active Learning approach in mind. It also incorporates some Activity Calendar ideas. It is made from 1/8th inch thick pegboard, spray painted a flat black. The “pages” in this version are 9”X12” and are relatively lightweight and easy to turn. The “spine” and “binding” are spray painted black so that the book itself creates a high contrasting background. It is important to noted that for photographic purposes and to make it stand out to the viewer of this website, the photographs were taken with the book on a white background, which makes the pegboard holes stand out. When using with a student, the book should sit on a black table or mat and an Invisiboard should be set up behind the book to eliminate visual distractions of the holes. In this book, real, familiar objects are attached with black elastic, so that the objects can be manipulated and explored, but then they pop back to the page for later use. On one page (light up toothbrush), a black retractable badge holder is used because the child who this book was developed for likes to put his toothbrush in his mouth. The base of the Pegboard book has sturdy “legs” which extend outward towards the student, to keep the book in one spot when the pages are turned forcefully or roughly. Additional clamps can be added behind the book to further stabilize it, if needed.
This book was made following a “Get Ready for School” routine, which a young MI/VI (CVI) student uses. This student visually functions in Phase II on the CVI Range. His preferences helped to guide us, in part, in choosing each of the interesting, tactual and auditory materials, each representing what he does in the morning. In other words, the materials in his book all have meaning to him, they are not random objects.
Key elements of this “CVI Friendly” Pegboard Book and the specific objects chosen include;
- Using the student’s favorite, preferred color, which acts as a salient feature
- Incorporating the student’s favorite, familiar household objects
- Incorporating elements of light
- Incorporating objects or materials which have movement qualities and/or reflective qualities
- Ability to position the entire Pegboard Book so that it is presented in the best visual field for the student
- The pages stand upright, bringing the objects into the student’s field of view (note; many students with CP have lower visual field difficulties)
- There is only one target or object on a page, and pages are NOT used on their back side, to help reduce complexity in the array
- Ability to bring the Pegboard Book close to the student, within 24 inches or closer
If the student can reach and grasp the target or object, they can bring it even closer to their face because of the elastic attachments (or retractable badge card reel). Once released, it will pop back into place for later exploration and be exactly where they left it.
It will be important to set up an Invisiboard (or other similar black backdrop) behind the Pegboard Book, to eliminate distant “visual clutter” which might interfere with looking toward/at the Pegboard Book. This also has the added benefit, as noted above, of making the holes in the pegboard “disappear”.
The story lines for this book were kept separate, on a separate sheet of paper. Because this student loves music and specific tunes, this story was sung to the tune of, “These are a Few of my Favorite Things”.
TUTORIAL
Below is the list of materials and tools you’ll need for this project.
MATERIALS
- Pegboards
- Black spray paint
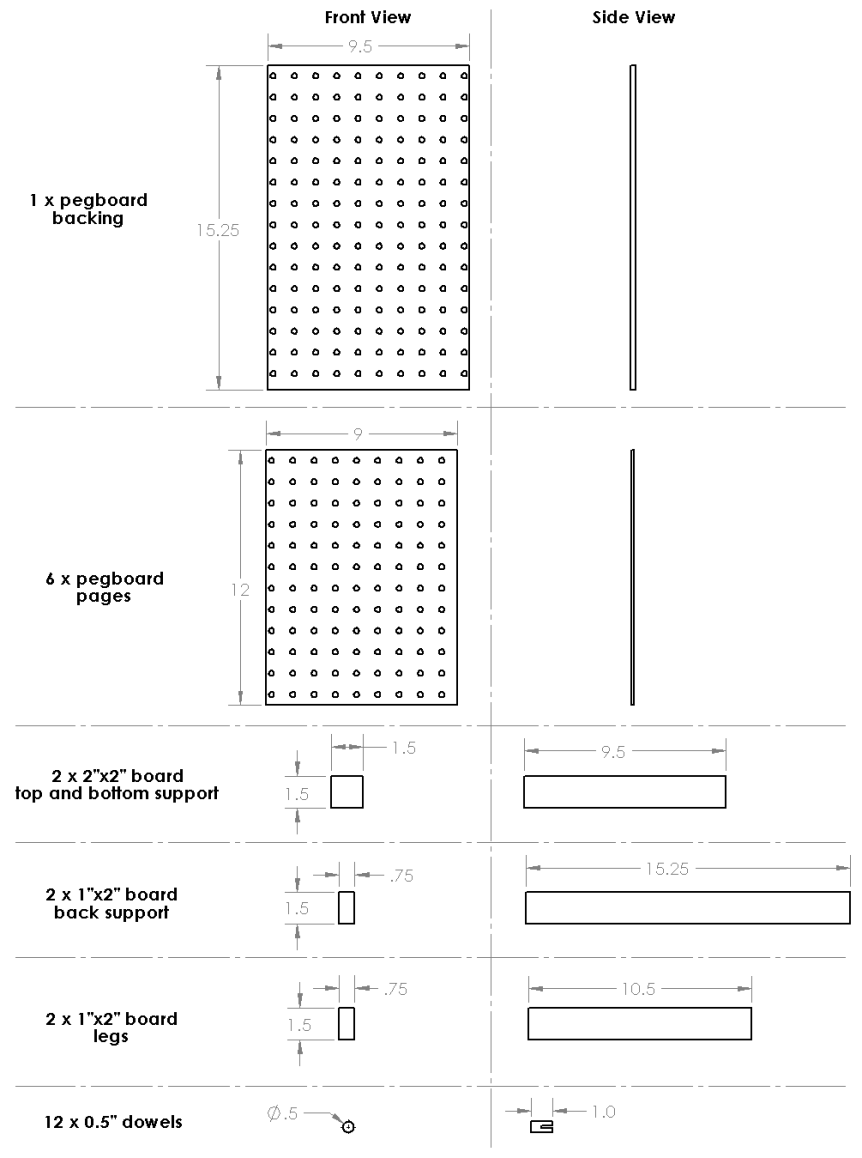
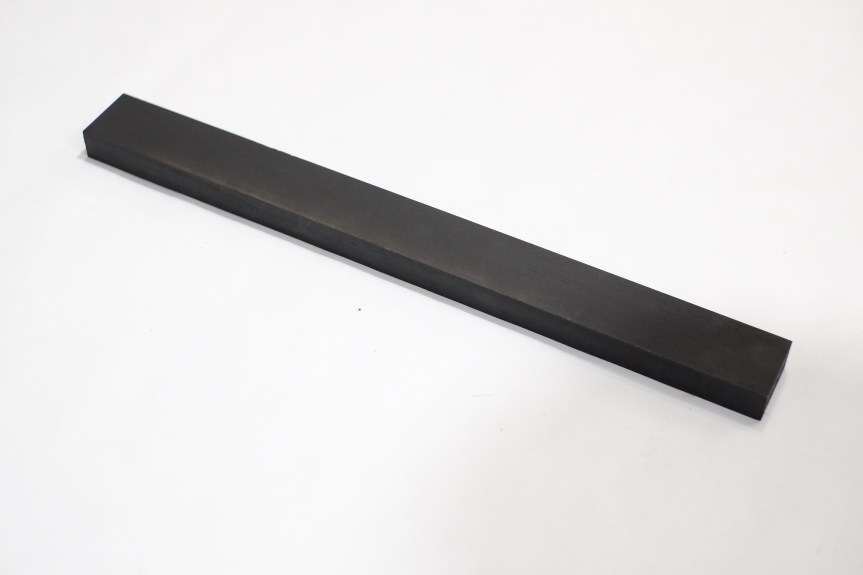
- 2×2 boards (two 9.5″ pieces)
- 1×2 boards (two 15.25″ pieces plus two 10.5″ pieces)
- 1/2″ diameter dowels
- #8 x 1-1/2 wood screws
- Wood glue
- Black elastic cord
- Black retractable badge holder
TOOLS
- Table saw, miter saw, circular saw, OR jigsaw to make your cuts
- Power drill
- 1/2″ drill bit
- 1/8″ drill bit
- 1/2″ countersink bit
- Power screwdriver
STEP 1: Cut pages
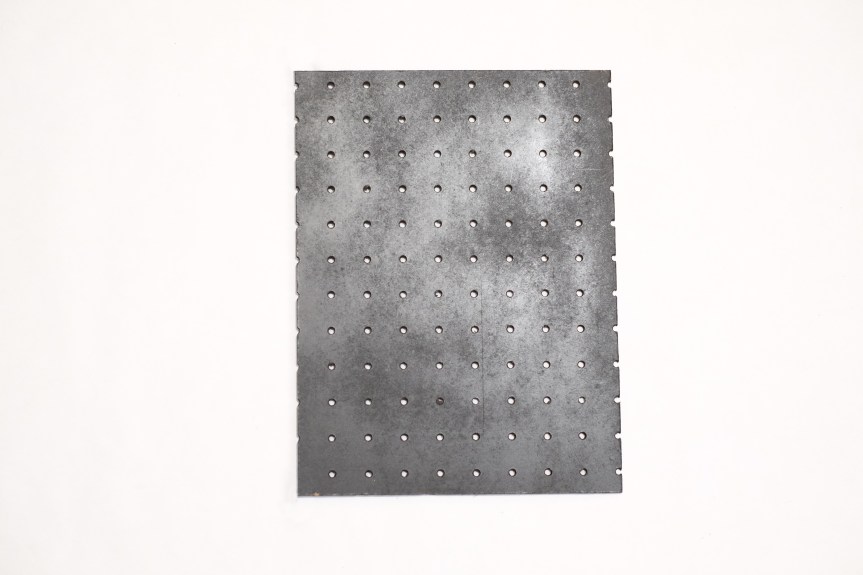
Cut your pegboard down to size (9″ x 12″). I recommend measuring and tracing out the lines you plan to cut first. You can make the cuts a few ways: use a table saw, a circular saw, or a jigsaw with a straight edge. I used a table saw.
STEP 2: Add hinges
Next you’ll need to add hinges to your pages.
Take your dowels and cut them to 1″ lengths (12 pieces). You’ll need to cut a 1/8″ wide slot in the dowels with a 1/2″ depth. Your method may depend on your tools, but a table saw would work if you attach the dowel (before cutting it into the 12 pieces) to a scrap piece of wood to stabilize and guide the dowel.
Note: I actually ended up finding some tubular plastic that worked instead, which is why my hinges look a little different in the photo below. But a dowel should work just fine.
Each page will need a dowel hinge at the top and at the bottom. Apply wood glue to the slot in one dowel and push it onto edge of the top of the page, leaving 1/2″ of it sticking up above. Do the same onto the bottom of the page, with 1/2″ sticking out below. (See photo below for reference). Set these aside to dry as per the glue’s instructions.
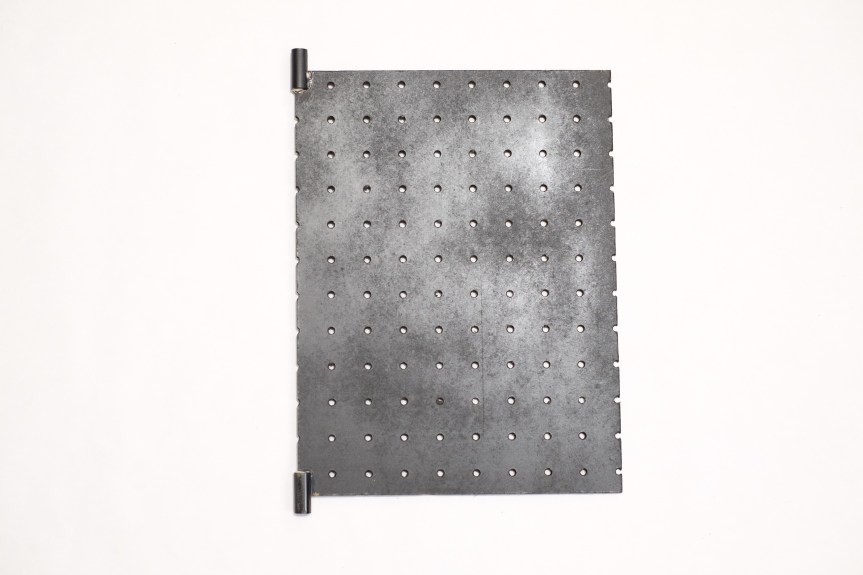

Once you’ve cut your pegboard pages and attached the hinges, spray paint them with flat black paint. I used Rustoleum, but you can use anything that says it adheres to wood (most spray paint will).
STEP 3: Cut the backing
Cut the pegboards to size (9.5″ x 15.25″) to create the pegboard backing for your book, which is essentially your book’s spine. Spray paint it black as well and set aside to dry.
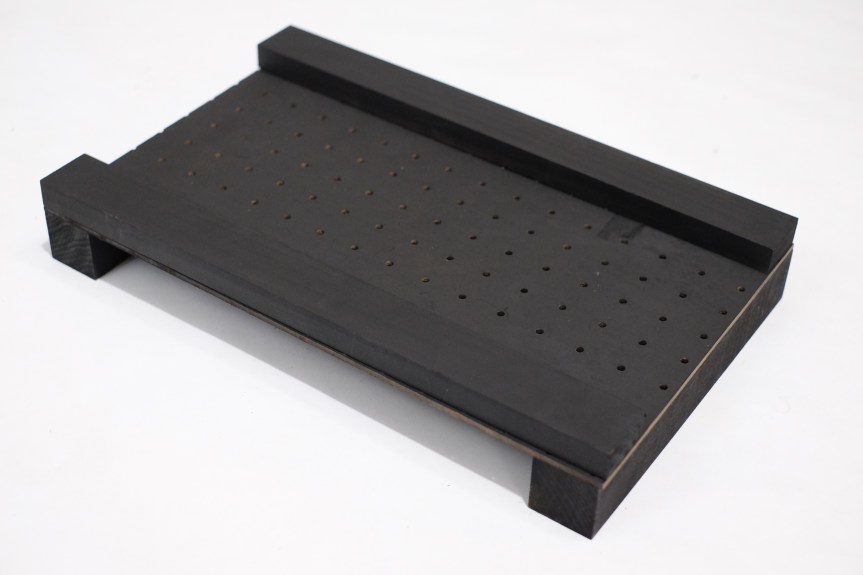
STEP 4: Backing top, bottom, and vertical supports
In this next step, you’ll cut a top support, a bottom support, and two vertical support pieces that you’ll attach to your backing. I’ll start with the top and bottom supports.
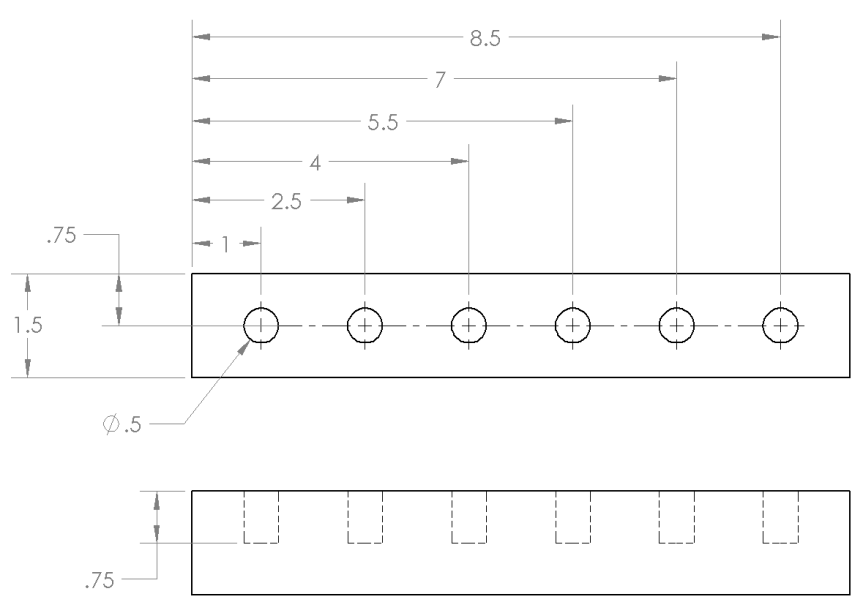
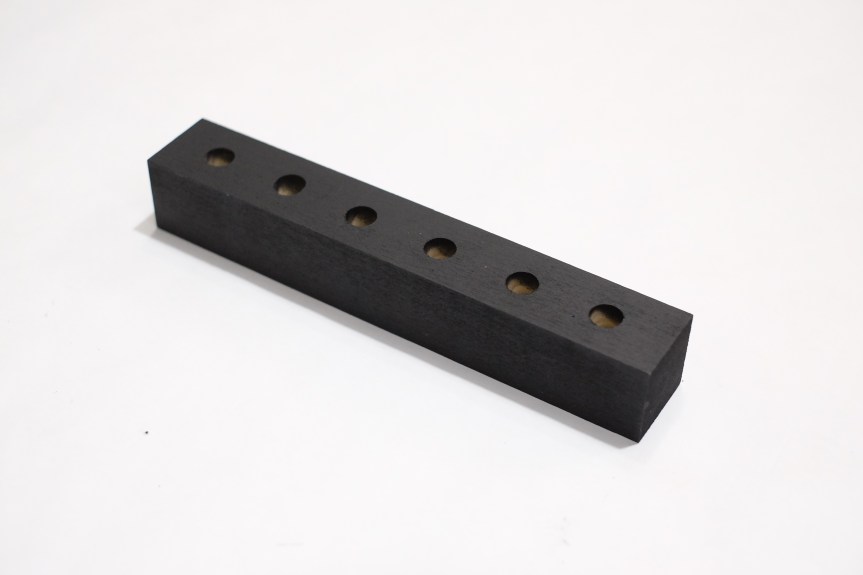
The top and bottom supports act as a place for your pegboard pages to attach at the top and bottom of your backing. Cut a 2×2 board into two 9.5″ pieces (the same width as your backing). You can use a table saw, miter saw, a circular saw, or a jigsaw. We used a miter saw.
Then use a drill with a 1/2″ bit to to drill six holes into each 2×2. The holes should be .75″ deep, and you should space them out as shown in the diagram below. This means the center of the first hole is 1″ from the edge, the center of the second hole is 2.5″ from the edge, etc.
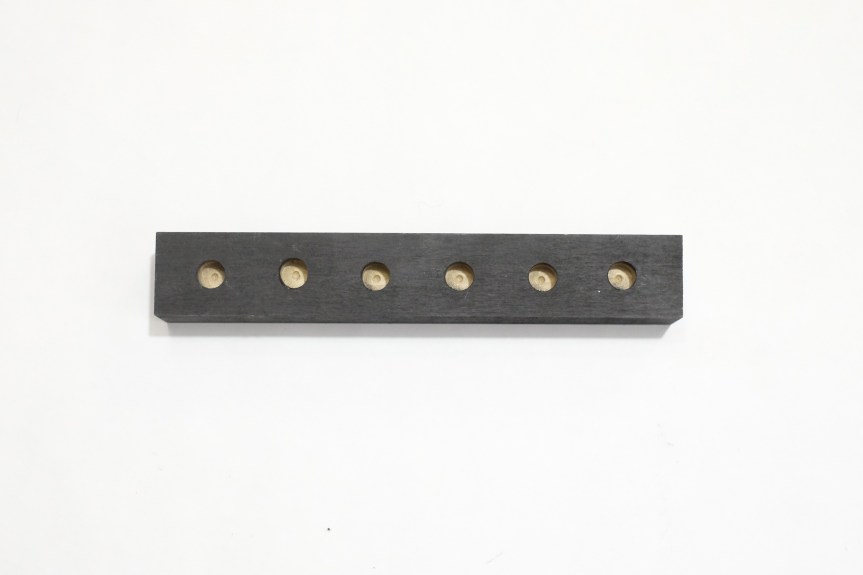
After cutting these, I spray painted them black and set them aside to dry.
Before you attach these two pieces to your backing, you’ll need to cut your vertical supports too. I added these to strengthen the pegboard backing (pegboard is not very thick, and I wanted this to last).
Cut two pieces of 1×2 board to 15.25″ long. You can use a table saw, miter saw, a circular saw, or a jigsaw.
Next, spray paint them both black.
Now that you have your top support, bottom support, and two vertical supports, you’re ready to attach them to your backing.
Arrange the pieces as shown below, with the pegboard sandwiched in between your supports (the top and bottom support underneath it, and the vertical supports above it). The holes in the top and bottom supports should be facing each other (see the diagram underneath this photo).

Using your power drill, drill pilot holes with a 1/8″ drill bit. The pilot hole helps you screw through these pieces to attach them all without splintering your wood. You’ll drill through the vertical supports, down through the pegboard, and into the top support and bottom support. We drilled through two spots on each corner, so make a total of eight pilot holes.

Then use a power screwdriver to screw in the #8 x 1-1/2 wood screws. You’ll ONLY screw in the bottom support right now. The bottom and top supports are identical, so it doesn’t matter which you choose to be the bottom. We will add the top later.


STEP 5: Adding the stabilizing legs
Next, you’ll add your stabilizing legs. This step is important because the children using this book often turn the pages forcefully and you don’t want the book falling on top of them.

You’ll attach the feet to the outside edge of the bottom of your backing. Just like we did with the supports earlier, you need to make pilot holes. We made two holes for each leg. Stand the backing on its side and drill through the outside of the leg into the backing, like in the photo below.

Then use your power screwdriver to drive screws through these pilot holes and attach the legs to your backing. This will make your book nice and sturdy.

STEP 6: Adding the pages
The reason we haven’t added the top support yet (even though we pre-drilled pilot holes for it) is because you need to attach the pages before you can add the top support.
Lay your backing down so that the legs are sticking straight up. Place the bottom hinge (dowel) of each page into the hole on the bottom support. It might be a little tricky to hold them all in place, so having two people makes this step easier.
While holding them in place, add the top support by lining up the top hinge (dowel) of each page with the holes in the top support. Again, this step is easier with two people holding everything in place.


Once that top support piece is in place, use your power screwdriver to drill #8 x 1-1/2 wood screws through the four pilot holes you drilled earlier (through the vertical supports, through the pegboard, and into your top support). Now your pages are secured in place.


STEP 7: Adding the Active Learning materials
Now comes the fun part! Determine what materials your student will benefit most from, and hang them from the pegboard pages using black corded elastic and/or black retractable badge holders.


My husband, Hans, who I appreciate greatly, made this book for me. Thank you! My neighbor Hermie, helped with some intricate cutting. Thanks go out to him too!
A BIG thank you goes out to my son and daughter in law, Evan and Katelyn, who created this tutorial. You can see more of their DIY tutorials on their youtube channel: https://www.youtube.com/evanandkatelyn
Note: This post contains affiliate links. Thank you for the support!
