Tips, Tricks, Modifications and Strategies
Invisiboard Toy Bar
May 1, 2020

Creating materials for students with CVI is always fun for me and I often wish I had more time to be creative. During these days of self-quarantine, I finally have some time to create materials, books and even do some repair work, that has been on my, “To Do” list. I will be posting photos of materials, along with tips, tricks, modifications and strategies regarding materials created in the hope that you too will try your hand at making some unique, child-specific materials for your student or child. When appropriate, I will offer templates and other materials for you to use, to complete the project as well. For this post, I will be sharing how re-designed my Invisiboard Toy Bar.
If you read my last post, you will know that my Invisiboard had to be refurbished because the fabric was falling off. I blamed it on the hot car travel I do as an independent consultant, mostly here in the state of Texas where materials stored in the back of a car can get incredibly hot. My Invisiboard had lost its “glue grip” and the hook and loop compatible fabric was disintegrated. What I didn’t say was that the design of my old Invisiboard Toy Bar was probably somewhat responsible for the fabric’s demise. My previous Toy Bar used to fasten to the sides of the Invisiboard by Velcro. When I attached toys and other visual targets to the bar, the fabric came loose.
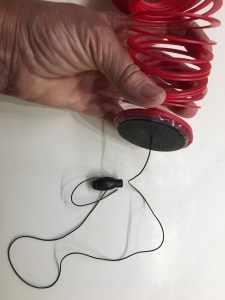
Pictured above: Previous method of fastening the bar to the panels – using Velcro on the ends of the bar.

Pictured above: Previous Invisiboard which had the fabric pulled away from the panels, partly due to the Toy Bar (first edition).
Therefore, I redesigned the Toy Bar so that it now rests on the top edge of each side panel. In this way, I can hang relatively heavy toys and targets on the Bar and it won’t weigh down the hook and loop compatible fabric.
What you will need to make this updated, Invisiboard Toy Bar:
- 5 inches of 1” diameter PVC pipe
- Flat, black spray paint, I usually use Krylon (just make sure it is a flat black, not glossy) https://amzn.to/3bUw562 *affiliate income
- A Sawzall and a Dremel
Cut and Mark the PVC Pipe
First, cut your PVC pipe to the appropriate length using a PVC pipe cutting tool or a Sawzall. I cut the pipe a length of 27.5 inches.

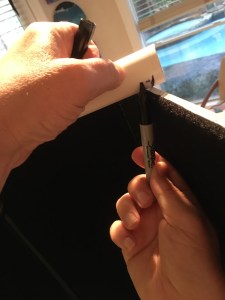
Next, mark where you will want to cut the channel at either end of the pipe. Mark the pipe as it sits on the board, so you can match the angle of the side panels.
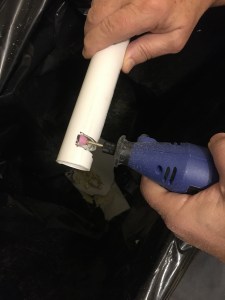
Cut the Channel on either side of the Pipe
Using a Sawzall, carefully cut ½ way through the pipe, following your marked guidelines.

Use a Dremel to cut the horizontal cut that will release the channel.
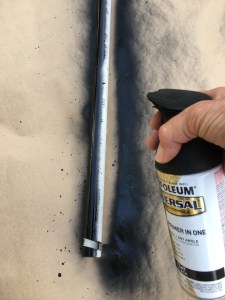
Paint the Bar
Using a flat, black spray paint, paint the bar covering the white evenly.
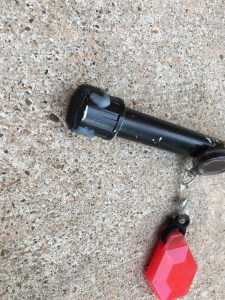
I use black rubber bands on the pipe, which I attach my visual targets to (alternately, you could cut a small oval hole with a Dremel). Many of the targets I attach to the Bar with a black, retractable name badge. I use the hook on the name badge and hook it through the rubber band or the Dremel hole. By using the retractable name badge, when the child grabs the object, they can then pull it towards themself, then release it and it goes back to its original position. Also, keep in mind that some children have a different field of reach (FoR) from their field of view (FoV). For these children, make sure you have hanging visual targets, such as a Slinky Jr., which hangs in their field of reach, and when they grasp it and it shakes, they can see that action in their field of view. In this way they can develop a better understanding of cause and effect.


Author’s Note: During one of our recent “Coffee Hour” Zoom Webinars covering materials to use with students who visually function in Phase II, one of the attendees noted in the Chat Box an alternate idea, that is much less expensive and really, does almost the same thing. She noted that uses a black tri-fold board (I assume the type you can purchase at Office Depot for Science Projects) and puts holes in the two folded sides then inserts a piece of black-taped PVC pipe. She notes that she uses it with kiddos on the floor, in wheelchairs, adaptive chairs, etc. She uses clear shower rings to hang targets from and the board helps to block out extraneous distractions.

My interpretation of what she mentioned is as follows.
Materials needed:
- 3 paneled presentation board. https://amzn.to/3c3jJbZ *affiliate income
- 3/4th inch PVC pipe, cut to a length of 31 inches
- X-acto knife #2 https://amzn.to/2KYAdWX *affiliate income
- Template for a 1” circle (I used the Everyday Mathematics Geometry Template https://amzn.to/3c5jKfr *affiliate income)
- White pencil (I used a water soluble marking pencil in white)
- Measuring tape
- Flat, black spray paint, I usually use Krylon (just make sure it is a flat black, not glossy) https://amzn.to/3bUw562 *affiliate income
- Self-healing cutting mat
Cut your PVC pipe about 31 inches in length. Spray paint it black. Mark your 1-inch diameter circles on the top, side panels of your presentation board (I marked my circles 6 inches in from each side and down 1 inch from the top).

Place your presentation board on top of the self-healing mat and carefully cut out the circle.


Thread your black bar (PCV pipe) through the holes and hang a target (or targets) on it so that they hang within reach of your student.

Please note: One or more of the links noted on this blog are affiliate links. This simply means that if you click on a link and make a purchase, I may receive a small commission at NO EXTRA cost to you. As an Amazon Affiliate, I earn from qualifying purchases.
